Tuesday, June 30, 2009

GNU Privacy Guard (GPG)

Features:
1. Public key pair generation & maintenance for all users on system. Keys are stored in ~/.gunpg
2. Encrypt/Decrypt files - based on communication partner's public key
3. Encrypt/Decrypt E-mails - based on recipient's public key
4. Generate/Manage digital signatures(means of proving identity)

###Install GPG###
1. www.sunfreeware.com
2. gunzip gnupg-1.2.6-sol10-intel-local.gz && pkgadd -d gnupg-1.2.6-sol10-intel-local

Note: GPG manages by default, 2 key chains:
1. Public - your public key, and potentially others
a. use 'gpg --list-keys' to enumerate public keys
2. Private - your private key(s)

Note: gpg uses recipient's public key to encrypt communications(e-mail/files)


###Create Public/Private Key-Pair###
gpg --gen-key
Note: 'gpg --gen-key' functions similarly to 'ssh-keygen' utility
Note: passphrase is associated with 'private key' of pub/priv pair

Note: GPG is compatible with PGP


###Import other's public keys###

Read the rest of this entry...

Bookmark and Share My Zimbio http://www.wikio.com

Monday, June 29, 2009

FTPD Notes

wu-ftpd
FTPD binds to TCP port 21 and is running by default
SMF controls service configuration
svcs -l ftp - returns configuration

pkginfo -x | grep -i ftp - returns SUNWftpu|r packages

SUNWftpu - includes useful user packages
ftpcount - dumps count per class
ftpwwho - returns connected users & process information
ftpconfig - used to setup anonymous/guest FTP

SUNWftpr - includes server-side configuration files
/etc/ftpd
- ftpaccess - primary configuration file for wu-ftpd
- ftphosts - allow|deny access to users from hosts
- ftpservers - allows admin to define virtual hosts
- ftpusers - users listed may NOT access the server via FTP
- ftpconversions - facilitates tar, compress, gzip support

wu-ftpd supports both types of FTP connections:
1. PORT - Active FTP
- Client -> TCP:21(Server-Control-Connection)
- Client executes 'ls' -> results in server initiating a connection back to the client usually on TCP:20(ftp-data)
2. PASV - Passive FTP
- Client -> TCP:21(Server-Control-Connection)
- Client executes 'ls' -> results in server opening a high-port and instructing the client to source(initiate) a connection to the server.
- Client sources data connection to high-port on server

###Anonymous FTP configuration###
use 'ftpconfig' to provision anonymous access
Note: Guest connections are jailed using chroot()

###FTPD Class Support###
Facilitates the grouping of users for the purpose of assigning directives
3 Default Classes:
1. realusers - CAN login using shell(SSH/Telnet) - CAN browse the entire directory tree
2. guestusers - Temporary users - see chrooted envrionment
3. anonusers - General public - primarily for download capability


###Guest User Support###
Jailed/chrooted environment

Steps:
1. useradd -d /home/guests/unixcbt4 -s /bin/true
2. mkdir /export/home/guests/unixcbt4
3. chown unixcbt4 /export/home/guests/unixcbt4
4. ftpconfig -d /export/home/guests/unixcbt4 - sets up chrooted environment
5. updated /etc/ftpd/ftpaccess - config file
guestuser unixcbt4
6. restart ftp using svcadm restart ftp

Note: Guest users are similar to real users except guest users are chrooted/jailed.

###Virtual Hosts###
wu-ftpd - supports 2 forms of virtual hosts:
1. Limited - relies upon primary config files /etc/ftpd{ftpaccess,ftpusers...}
Admin. may define unique attributes including the following:
a. banner
b. logfile
c. hostname
d. email
e. distinct IP address

2. Full - relies upon distinct config files in specified directory
a. offers everything included with limited virtual hosts mode
b. also adds distinct config files
c. Note: Full-mode will use default config files in /etc/ftpd if the full virtual hosts instance is unable to find a distinct file.


###Limited Virtual Hosts Configuration###
/etc/ftpaccess
virtual 192.168.1.51 root /var/ftp2
virtual 192.168.1.51 hostname linuxcbtdb1.linuxcbt.internal
virtual 192.168.1.51 banner /var/ftp2/.welcome_message.msg
virtual 192.168.1.51 logfile /var/log/ftp2/xferlog
virtual 192.168.1.51 allow unixcbt3


Note: Virtual hosts do not allow real & guest users access by default

###Full Virtual Hosts Configuration###
/etc/ftpd/ftpservers
address configuration_direction
192.168.1.51 /etc/ftpd/ftp2
192.168.1.52 /etc/ftpd/ftp3

Read the rest of this entry...

Bookmark and Share My Zimbio http://www.wikio.com

Sunday, June 28, 2009

Partition/slice & create file systems

Steps necessary to partition/slice & create file systems:

Steps:
1. unmount existing file systems
-umount /data2 /data3

2. confirm fdisk partitions via 'format' utility
-format - select disk - select fdisk

3. use partition - modify to create slices on desired drives
DISK1
-slice 0 - /dev/dsk/c0t1d0s0
DISK2
-slice 0 - /dev/dsk/c0t2d0s0

4. Create file system using 'newfs /dev/rdsk/c0t0d0s0'

5. Use 'fsck /dev/rdsk/c0t1d0s0' to verify the consistency of the file system

6. Mount file systems at various mount points
mount /dev/dsk/c0t1d0s0 /data2 && mount /dev/dsk/c0t2d0s0 /data3
7. create entries in Virtual File System Table (/etc/vfstab) file


###How to determine file system associated with device###
1. fstyp /dev/dsk/c0t0d0s0 - returns file system type
2. grep mount point from /etc/vfstab - returns matching line
grep /var /etc/vfstab
3. cat /etc/mnttab - displays currently mounted file system

###Temporary File System (TEMPFS) Implementation###
TempFS provides in-memory (RAM), very fast, storage and boosts application performance

Steps:
1. Determine available memory and the amount you can spare for TEMPFS
-prtconf
- allocate 100MB
2. Execute mount command:

mkdir /tempdata && chmod 777 /tempdata && mount -F tmpfs -osize=100m swap /tempdata

Note: TEMPFS data does NOT persist/survive across reboots
Note: TEMPFS data is lost when the following occurs:
1. TEMPFS mount point is unmounted: i.e. umount /tempdata
2. System reboot

Modify /etc/vfstab to include the TEMPFS mount point for reboots

swap - /tempdata tmpfs - yes -

###Swap File/Partition Creation###
swap -l | -s - to display swap information

mkfile size location_of_file - to create swap file
mkfile 512m /data2/swap2

swap -a /data2/swap2 - activates swap file

To remove swap file:
swap -d /data2/swap2 - removes swap space from kernel. does NOT remove file
rm -rf /data2/swap2

###Swap Partition Creation###
format - select disk - partition - select slice/modify
swap -a /dev/dsk/c0t2d0s1

Modify /etc/vfstab


###Volume Management###
Solaris' Volume Management permits the creation of 5 object types:
1. Volumes(RAID 0(concatenation or stripe)/1(mirroring)/5(striping with parity)
2. Soft partitions - permits the creation of very large storage devices
3. Hot spare pools - facilitates provisioning of spare storage for use when RAID-1/5 volume has failed
i.e. MIRROR
-DISK1
-DISK2
-DISK3 - spare

4. State database replica - MUST be created prior to volumes
- Contains configuration & status of ALL managed objects (volumes/hot spare pools/Soft partitions/etc.)

5. Disk sets - used when clustering Solaris in failover mode

Note: Volume Management facilitates the creation of virtual disks
Note: Virtual disks are accessible via: /dev/md/dsk & /dev/md/rdsk
Rules regarding Volumes:
1. State database replicas are required
2. Volumes can be created using dedicated slices
3. Volumes can be created on slices with state database replicas
4. Volumes created by volume manager CANNOT be managed using 'format', however, can be managed using CLI-tools (metadb, metainit) and GUI tool (SMC)
5. You may use tools such as 'mkfs', 'newfs', 'growfs'
6. You may grow volumes using 'growfs'


###State Database Replicas###
Note: At least 3 replicas are required for a consistent, functional, multi-user Solaris system.

3 - yields at least 2 replicas in the event of a failure
Note: if replicas are on same slice or media and are lost, then Volume Management will fail, causing loss of data.
Note: place replicas on as many distinct controllers/disks as possible

Note: Max of 50 replicas per disk set

Note: Volume Management relies upon Majority Consensu Algorithm (MCA) to determine the consistency of the volume information

3 replicas = 1.5(half) = 1-rounded-down +1 = 2 = MCA(half +1)

Note: try to create an even amount of replicas
4 replicas = 2(half) + 1 = 3

State database replica is approximately 4MB by default - for local storage

Rules regarding storage location of state database replicas:
1. dedicated partition/slice - c0t1d0s3
2. local partition that is to be used in a volume(RAID 0/1/5)
3. UFS logging devices
4. '/', '/usr', 'swap', and other UFS partitions CANNOT be used to store state database replicas

###Configure slices to accomodate State Database Replicas###
c0t1d0s0 -
c0t2d0s0 -
RAID 0 (STRIPE) - 60GB

###Create RAID 0 (STRIPE) - NOT REDUNDANT###
c0t1d0s0 -
c0t2d0s0 -
RAID 0 (STRIPE) - 60GB - /dev/md/dsk/d0
Note: Volumes can be created using slices from a single or multiple disks
Note: State database replicas serve for ALL volumes managed by Volume Manager

Note: RAID 0 Concatenation - exhausts DISK1 before writing to DISK2
Note: RAID 0 Stripe - distributes data evenly across members
Note: Use the same size slices when using RAID0 with Striping


Note: after defining volume, create file system
newfs /dev/md/rdsk/d0

###Suggested layout for creating volumes using volume manger###
SERVER
-DISK0 - SYSTEM DISK

VOLUME MANAGE SECONDARY DISKS
-DISK1 - SECONDARY DISK
-DISK2 - SECONDARY DISK

##RAID-1 Configuration###
Note: RAID-1 relies upon submirrors or existing RAID-0 volumes
c0t1d0s0 - /dev/md/dsk/d0
c0t2d0s0 - /dev/md/dsk/d1
/dev/md/dsk/d2

d0 - source sub-mirror
d1 - destination sub-mirror

Create file system on mirrored volume '/dev/md/dsk/d2'
newfs /dev/md/rdsk/d2

###RAID-5 Configuration###
Steps:
1. Ensure that 3 components(slices/disks) are available for configuration
2. Ensure that components are identical in size

Slices for RAID-5
c0t1d0s0 - 10GB
c0t1d0s0 - 10GB
c0t2d0s0 - 10GB

/dev/md/dsk/d0 = RAID-5 = 20GB

Note: You may attach components to RAID-5 volume, but they will not store parity information, however, their data will be protected.


###Using growfs to extend volumes###
growfs extends mounted/unmounted volumes(UFS/ZFS)

Steps to grow a mounted/unmounted file syste
1. Find free slice(s) to add as component(s) to volume using SMC or metattach CLI
2. Add component slice - wait for initialization(concatenation) to complete
3. execute 'growfs -M /d0 /dev/md/rdsk/d0'

Note: Once you've extended a volume, you CANNOT decrease it in size.
Note: Concatenation of RAID-1/5 volumes yields an untrue RAID-1/5 volume.
SLICE1
SLICE2
SLICE3
SLICE4 - Concatenated - NOT a true RAID-1/5 member (no parity is stored)

Note: When extending RAID-1 volumes, extend each sub-mirror first, and then Solaris will automatically extend the RAID-1 volume. Then run 'growfs.'


###Soft Partitions###
1. Provides an abstracted, extensible partition object
2. Permits virtually unlimitted segmentation of disk
c0t1d0 - s0-9 (0-7 except 2, usable)

3. Permits creation of partitions on top of 1 or more slices

Steps:
1. Clean up partitions on existing disks: c0t1d0 & c0t2d0


Read the rest of this entry...

Bookmark and Share My Zimbio http://www.wikio.com

Saturday, June 27, 2009

System Scheduler-Cron Notes

Features:
1. Permits scheduling of scripts(shell/perl/python/ruby/PHP/etc.)/tasks on a per-user basis via individual cron tables.
2. Permits recurring execution of tasks
3. Permits one-time execution of tasks via 'at'
4. Logs results(exit status but can be full output) of executed tasks
5. Facilitates restrictions/permissions via - cron.deny,cron.allow,at.*

Directory Layout for Cron daemon:
/var/spool/cron - and sub-directories of to store cron & at entries
/var/spool/cron/atjobs - houses one-off, atjobs
- 787546321.a - corresponds to a user's atjob

/var/spool/cron/crontabs - houses recurring jobs for users
- username - these files house recurring tasks for each user


Cron command:
crontab - facilitates the management of cron table files
-crontab -l - lists the cron table for current user -
- reads /var/spool/cron/crontabs/root

###Cron table format###

m(0-59) h(0-23) dom(1-31) m(1-12) dow(0-6) command
10 3 * * * /usr/sbin/logadm - 3:10AM - every day
15 3 * * 0 /usr/lib/fs/nfs/nfsfind - 3:15 - every Sunday
30 3 * * * [ -x /usr/lib/gss/gsscred_clean ] && /usr/lib/gss/gsscred_clean
1 2 * * * [ -x /usr/sbin/rtc ] && /usr/sbin/rtc -c > /dev/null 2>&1

m(0-59) h(0-23) dom(1-31) m(1-12) dow(0-6) command
Note: (date/time/command) MUST be on 1 line
m = minute(0-59)
h = hour(0-23)
dom = day of the month(1-31)
m = month(1-12)
dow = day of the week(0-6) - 0=Sunday

Note: each line contains 6 fields/columns - 5 pertain to date & time of execution, and the 6th pertains to command to execute

#m h dom m dow
10 3 * * * /usr/sbin/logadm - 3:10AM - every day
* * * * * /usr/sbin/logadm - every minute,hour,dom,m,dow
*/5 * * * * /usr/sbin/logadm - every 5 minutes(0,5,10,15...)
1 0-4 * * * /usr/sbin/logadm - 1 minute after the hours 0-4
0 0,2,4,6,9 * * * /usr/sbin/logadm - top of the hours 0,2,4,6,9

1-9 0,2,4,6,9 * * * /usr/sbin/logadm - 1-9 minutes of hours 0,2,4,6,9

Note: Separate columns/fields using whitespace or tabs

###Create crontabs for root & unixcbt###
Note: ALWAYS test commands prior to crontab/at submission

11 * * * * repquota -va >> /reports/`date +%F`.quota.report

Note: set EDITOR variable to desired editor
export EDITOR=vim

###unixcbt - execute quota -v###
#!/usr/bin/bash
HOME=/export/home/unixcbt
quota -v >> $HOME/`date +%F`.unixcbt.quota.report
#END

Note: aim to reference scripts(shell/perl/python/ruby/PHP,etc.) instead of the various characters

Note:
Default Solaris install creates 'at.deny' & 'cron.deny'
You MUST not be included in either file to be able to submit at & cron entries

Conversely, if cron.allow and at.allow files exist, you MUST belong to either file to submit at or cron entries


Read the rest of this entry...

Bookmark and Share My Zimbio http://www.wikio.com

Friday, June 26, 2009

BIND DNS Implementation Notes

Bind 9.x
SUNWbind(client & server utilities) & SUNWbindr(SMF)

Steps to configure DNS:
1. Create /etc/named.conf - primary named/BIND/DNS configuration file

options {
directory "/var/named";
};

###Special zone indicating the root of the DNS hierarchy###
###Downloaded named.root from: ftp://ftp.rs.internic.net/domain/named.root##
zone "." {
type hint;
file "db.cache";
};

###Reverse Zones###
zone "0.0.127.in-addr.arpa" {
type master;
file "db.127.0.0";
};

zone "1.168.192.in-addr.arpa" {
type master;
file "db.192.168.1";
};
zone "20.16.172.in-addr.arpa" {
type master;
file "db.172.20.16";
};


###Forward Zones###
zone "unixcbt.internal" {
type master;
file "db.unixcbt.internal";
};

###Zone File Syntax###
Note: @ is a variable, which indicates the name of the zone as configured in /etc/named.conf

svcadm enable dns/server

Note: With or without master domains, BIND functions as a caching-only NS

Our server is configured to be:
1. Caching-Only Server
2. Authoritative Server


###Mail Exchanger(MX) Record Setup###
Note: Implement MX via 2 records
1. IN MX 10 mail.unixcbt.internal
2. mail IN A 192.168.1.197

###Slave DNS Server Configuration###
Note: There really isn't a Slave DNS Server with BIND, however, there is a SLAVE ZONE

Steps:
1. copy the following files to slave server:
a. db.127.0.0 - houses reverse, loopback zone info.
b. db.cache - houses root hints
c. named.conf - primary DNS BIND configuration file

Note: DNS BIND server can also be a slave server in addtion to caching-only and authoritative server.


Read the rest of this entry...

Bookmark and Share My Zimbio http://www.wikio.com

Thursday, June 25, 2009

Apache Web Server Notes

For an Apache web server the combinations you would use are:

SAMP - Solaris Apache MySQL PHP/Perl
LAMP - Linux Apache MySQL PHP/Perl/Python

Modular & Reliable

2 Versions (1.3.33 & 2.0.50) are included with Solaris 10
svcs -a | grep -i apache

Note: Apache2 documentation is available @: http://localhost/manual
Steps to invoke Apache on Solaris 10:
1. cp /etc/apache2/httpd.conf-example /etc/apache2/httpd.conf
2. update servername & server admin directives for main server
3. svcadm enable apache2
4. netstat -anP tcp | grep 80 && http://localhost/manual

Note: Typical classes of web server errors:
200 - OK
300 - Redirect
400 - client error
500 - server errors

Note: Apache ALWAYS maintains a DEFAULT HOST. Config is in httpd.conf and outside of ANY and ALL virtual hosts containers
Note: Apache requires the following info. for the DEFAULT HOST:
1. ServerName linuxcbtsun1.linuxcbt.internal
2. ServerAdmin
3. DocumentRoot - where to serve content from
4. IP Address:Port to bind to - optional
5. Logging information - custom/combined & error logs


Note: Listen directive controls IPs and ports that Apache binds to
Note: specify 'Listen' directive(s) in the DEFAULT HOST(httpd.conf)
Note: You can specify multiple Listen Directives
Note: Apache binds to ALL IP addresses when 'Listen' is specified without an IP address

DEFAULT HOST(IP:PORT)
-Virtual Host 1
-Virtual Host 2


<Directory "/var/apache2/htdocs">
Options Indexes FollowSymLinks
AllowOverride None
Order allow,deny
Allow from all
</Directory>
<Directory "/var/apache2/htdocs/temp">
Options FollowSymLinks
AllowOverride None

Order allow,deny
Allow from all
</Directory>

Note: <Directory "/var/apache2/htdocs"> - applies to all sub-directories

###Order, Allow, Deny Rules###
Note: Order is specified and Deny or Allow or combination follows
Note: Allow|Deny supports the following attributes
1. IP Address - 127.0.0.1
2. IP Address range
3. IP Subnet Mask using CIDR or Class notation - 192.168.1.0/24 or 192.168.1.0/255.255.255.0
4. 192.168.1
5. ALL
6. Environment variables - referrer, user agents

Used to influence default doc: DirectoryIndex index.html index.html.var

LogFormat is used to define logging keywords that can be referenced
Apache can log to multiple log files, various keywords, simultaneously

###Alias Directive###
Maps webspace location to file system location, usually non-document root


###Files Directive###
Facilitates restrictions on matchings files regardless of location on server
<Files noaccess.html>
Order allow,deny
Deny from all
</Files>
Note: When applied OUTSIDE of <Directory> block, applies to all instances of named file throughout the web server

Task: Create web-accessible directory, but, restrict access to certain IPs
Steps:
1. mkdir /var/apache2/private
2. Create appropriate Alias - Alias /private/ /var/apache2/private/
3. Create appropriate <Directory> block


###Virtual Hosts Support###
2 Types of Virtual Hosts are supported:
1. IP-based - Each virtual host is associated with a distinct address
2. Name Based - All or a group of Virtual Hosts share a distinct address


###IP-based Virtual Hosting###
Note: System requires multiple IP addresses
Note: Default Apache Host binds to ALL IP addresses on port 80

Steps:
1. Implement appropriate 'Listen' directive
2. Configure Virtual Hosts
3. Restart Apache
4. Test configuration

Listen 192.168.1.50:80
<VirtualHost 192.168.1.50:80>
ServerName linuxcbtsun1.linuxcbt.internal
ServerAdmin unixcbt@linuxcbtsun1.linuxcbt.internal
DocumentRoot /var/apache2/ipvhost1
ErrorLog /var/apache2/logs/ipvhost1.error.log
CustomLog /var/apache2/logs/ipvhost1.access.log
</VirtualHost>
Note: Apache will serve content from the DocumentRoot of DEFAULT HOST if a request does NOT match any of the Virtual Hosts


Listen 192.168.1.51:80
<VirtualHost 192.168.1.51:80>
ServerName linuxcbtsun3.linuxcbt.internal
ServerAdmin unixcbt@linuxcbtsun1.linuxcbt.internal
DocumentRoot /var/apache2/ipvhost2
ErrorLog /var/apache2/logs/ipvhost2.error.log
CustomLog /var/apache2/logs/ipvhost2.access.log combined
</VirtualHost>


###NameBased Virtual Hosting###
Facilitates the sharing of 1 IP address by a group of web sites
Steps:
1. Define appropriate Listen directive(s)
2. Define appropriate NameVirtualHost directive(s)
3. Define Virtual Hosts
4. Restart Apache
5. Confirm configuration

Listen 80
NameVirtualHost *:80 - means to permit NameBased Virtual Hosts on ALL IPs
Note: NameVirtualHost directive MUST match VirtualHost directive

<VirtualHost *:80>
ServerName linuxcbtsun1.linuxcbt.internal
ServerAdmin unixcbt@linuxcbtsun1.linuxcbt.internal
DocumentRoot /var/apache2/namevhost1
ErrorLog /var/apache2/logs/namevhost1.error.log
CustomLog /var/apache2/logs/namevhost2.access.log combined
</VirtualHost>

Read the rest of this entry...

Bookmark and Share My Zimbio http://www.wikio.com

Wednesday, June 24, 2009

Solaris/UNIX Boot Process

Some new UNIX users (maybe new admins) or admins in training have been asking for a less technical overview of the UNIX/Solaris boot process. So in order to cater their request here's a brief overview of what goes on when booting:


The directories or startup script names might vary depending on the versions/releases you are using.

1. Start the operating system on a host.
2. The kernel runs /sbin/init, as part of the booting process.
3. /sbin/init runs the /etc/rcS.d/S30rootusr.sh. startup script.
4. The script runs a number of system startup tasks, including establishing the minimum host and network configurations for diskless and dataless operations. /etc/rcS.d/S30rootusr.sh also mounts the /usr file system.
1. If the local database files contain the required configuration information (host name and IP address), the script uses it.
2. If the information is not available in local host configuration files, /etc/rcS.d/S30rootusr.sh uses RARP to acquire the host's IP address.
5. If the local files contain domain name, host name, and default router address, the machine uses them. If the configuration information is not in local files, then the system uses the Bootparams protocol to acquire the host name, domain name, and default router address. Note that the required information must be available on a network configuration server that is located on the same network as the host. This is necessary because no internetwork communications exist at this point.
6. After /etc/rcS/S30rootusr.sh completes its tasks and several other boot procedures have executed, /etc/rc2.d/S69inet runs. This script executes startup tasks that must be completed before the name services (NIS, NIS+, or DNS) can start. These tasks include configuring the IP routing and setting the domain name.
7. At completion of the S69inet tasks, /etc/rc2.d/S71rpc runs. This script starts the NIS, NIS+, or DNS name service.
8. After /etc/rc2.d/S71 runs, /etc/rc2.d/S72inetsvc runs. This script starts up services that depend on the presence of the name services. S72inetsvc also starts the daemon inetd, which manages user services such as telnet.

Read the rest of this entry...

Bookmark and Share My Zimbio http://www.wikio.com

Tuesday, June 23, 2009

Howto: Which file belongs to package?

It migh get quite tricky to determine which file or files belongs to a package. Here's a way to find which file belong to a package.

You can use the command pkgchk, to find out file /usr/bin/volcheck belongs to which package:
# pkgchk -l -p /usr/bin/volcheck
Pathname: /usr/bin/volcheck
Type: regular file
Expected mode: 4555Expected owner: root
Expected group: bin
Expected file size (bytes): 6044
Expected sum(1) of contents: 14489
Expected last modification: Nov 04 16:15:49 2002
Referenced by the following packages:
SUNWvolu
Current status: installed

Read the rest of this entry...

Bookmark and Share My Zimbio http://www.wikio.com

Monday, June 22, 2009

Tape device names

In relation to my previous post Tape/device using mt command I decided to include here the tape device names that you'll normally use and encounter.

Before backing up data on a device, you must understand the tape device-naming schema:

First tape device name: /dev/rmt/0
Second tape device name: /dev/rmt/1

rmt = raw magnetic tape device

You can also add special character letter to specify density using following format
/dev/rmt/ZX

Note:

  • Z is tape drive number such as 0,1..n
  • X can be any one of following (as supported by your device, read the manual of your tape device & controller to see if all of them supported or not):
  • l - Low density
  • m - Medium density
  • h - High density
  • u - Ultra density
  • c - Compressed density
  • n - No rewinding
Example:

To specify the first, drive with high-density with no rewinding use device /dev/rmt/0hn.


Read the rest of this entry...

Bookmark and Share My Zimbio http://www.wikio.com

Sunday, June 21, 2009

Tape device/drive using mt command

With SAN around the use of tape backups have been set in the background. But before storage devices/filer this was the way to go for backing up data.

For me it's still worth familiarizing oneself with this commands. So here are the common ones you might encounter:

) Rewinding a tape
# mt –f /dev/rmt/0 rewind

2) Display the status of a tape drive
# mt –f /dev/rmt/0 status
It displays information as tape is loaded, offline, total files, blocks etc.

3) Retensioning a tape
# mt –f /dev/rmt/0 retension

Read the rest of this entry...

Bookmark and Share My Zimbio http://www.wikio.com

Saturday, June 20, 2009

iPhone bluetooth transfer via Jailbreak

Some of us are wondering when Bluetooth file transfer will become available on Apple’s mobile phone. Well, wonder no more because thanks to the developer MeDevil, iPhone Bluetooth file transfer may become a reality sooner than later as he is currently working on one as we speak.

This video is just a peak into the future of his app, and when the time is right, it will be unleashed to jailbroken iPhones all over the world via the iSpazio repo.


There’s still no word on when the full vesion will be released, but considering that these iPhone developers are such efficient folks, I wouldn’t be surprised if it goes live by next week.

Read the rest of this entry...

Bookmark and Share My Zimbio http://www.wikio.com

Friday, June 19, 2009

Hackers exploit “Hayden” sex videos

MANILA, Philippines—Hackers and computer virus writers have exploited the controversial sex videos now making rounds on the Internet, antivirus firm Trend Micro said Tuesday.

Malicious software are making their rounds in some US government websites masking themselves as links to the actual sex videos, Trend Micro through TrendLabs said.

The antivirus firm has identified computer Trojans TROJ_DLOAD.TID and its payload, TROJ_COGNAC.J, hidden in at least two US government websites.

The first attack was detected early last week, allegedly in the website of the San Bernardino County (http://www.sbcounty.gov/).

The attacked was meant to trick people into clicking a link to reveal supposed nude video of local actress Katrina Halili who was among those embroiled in the controversial sex videos.

The second attack, found by TrendLabs Analyst Joseph Pacamarra, was located in a state-wide information portal of Washington DC.

The security software firm has not yet announced the name of the website.

Similar to the San Bernardino County website attack, the other attack on the other US government website also leads to a video website, which supposedly contains the lurid videos.

TrendLabs explained that a blank website opens when a user clicks on the link in the compromised US government website. This then requires the user to download a codec to be able to watch the video. But that codec software allows the Trojan to slip into the user’s computer, enabling the virus writers to sneak in more malicious software into their systems.

No explanation was made as to why the computer virus authors chose the controversial sex scandal rocking the Philippines to trick people in a US government website to deliver their malware.

The sex video scandal has embroiled Filipino celebrity doctor Hayden Kho and sexy actress Halili and other personalities.

Source:

Alexander Villafania
INQUIRER.net
First Posted 17:01:00 06/02/2009

Read the rest of this entry...

Bookmark and Share My Zimbio http://www.wikio.com

Thursday, June 18, 2009

Liveleak: uncensored Yutube

This summary is not available. Please click here to view the post.

Read the rest of this entry...

Bookmark and Share My Zimbio http://www.wikio.com

Wednesday, June 17, 2009

Nortel assets to be sold to Nokia

MONTREAL--Canadian telecommunications firm Nortel, in bankruptcy protection since January, will sell most of its wireless business to Nokia Siemens Networks for $650 million.

Nortel also announced Friday it was making headway in discussions with other parties to sell its other businesses.

Nortel will apply to delist its common shares from trading on the Toronto Stock Exchange, the company said in a statement.

The agreement with Nokia also specifies that at least 2,500 Nortel employees can continue working with the new owner.

Nortel head Mike Zafirovski said the value of Nortel's wireless business was recognized worldwide and the agreement with Nokia represented the best path forward.

"We have determined the best way to do this is to find buyers for our businesses who can carry Nortel innovation forward, while preserving employment to the greatest extent possible," he said.

"This will ensure Nortel's strong assets -- technologies, customer relationships, and employees -- continue to play an important role in driving the future of communications.

But the announcement foreshadows the liquidation of the struggling Canadian company that was once a pillar of the country's telecoms industry.

The Nortel wireless business is the second largest supplier of Code Division Multiple Access (CDMA) infrastructure in the world.

CDMA is a channel access method utilized by various radio communication technologies that allow several transmitters to send information simultaneously over a single communication channel.

Nortel wireless does business with three of the five top CDMA operators globally, including Verizon Wireless, which operates the largest wireless voice and data network in the United States, company officials said.

Nortel said it will file the asset sale agreement with the US Bankruptcy Court in Delaware. A similar motion for the bidding procedures will be filed with the Ontario Superior Court of Justice, the company said.

Once Canada's largest company, Nortel has been struggling since the dot.com collapse.

When it filed for bankruptcy protection in both the United States and Canada in January, Nortel faced some $107 million in interest on its debt alone.

The company lost $3.4 billion in the third quarter of 2008 as revenues fell 14 percent.

Last year, Nortel said it was slashing 2,100 jobs mostly in North America and would transfer another 1,000 jobs to lower-cost countries, following deep losses.

Nortel, which did business in 150 countries and had about 26,000 employees around the world in February, traces its history back to 1882 as the mechanical department of Bell Telephone Canada.

It was later known as Northern Electric and Northern Telecom before changing its name in 1999 to Nortel Networks Corporation.

Source:
Agence France-Presse
First Posted 02:57:00 06/21/2009

Read the rest of this entry...

Bookmark and Share My Zimbio http://www.wikio.com

Tuesday, June 16, 2009

Free anti-virus software from Microsoft

Microsoft will soon release a free anti-virus software so people on tight budgets won't skimp on protecting their computers from hackers.

A test version of Microsoft Security Essentials (MSE) will be publicly available for download beginning June 23 in Brazil, Israel and the United States. It is to be rolled out in other countries later in the year.

"Cost and performance barriers prevent many consumers from using up-to-date security software to protect their PCs," Microsoft said in a statement.

The US software giant described MSE as "a no-cost anti-malware solution that provides consumers with quality protection from threats including viruses, spyware, rootkits and trojans."

The technology firm said that effective anti-virus protection is a "must-have" for computer users given increases in the number and severity of attacks by cyber criminals using malicious software to infect machines.

Paying to buy and routinely update computer security software "does not meet the needs of many consumers," including those in emerging markets where money and resources are scarce, according to Microsoft.

Source:
Agence France-Presse
First Posted 11:34:00 06/19/2009

Read the rest of this entry...

Bookmark and Share My Zimbio http://www.wikio.com

Monday, June 15, 2009

Free Data Recovery Software

Have you ever you lost some files and didn't have your data backup in place? Well, as long as your hardware was not physically damaged, there is still a chance you may be able to recover your files with free or very inexpensive data recovery software. Free data recovery software is a little hard to come by but here are a few good ones you can try.

There are two important things to consider with data recovery:

1.if your data is valuable and critical then you shouldn't be messing around with freeware. There are a lot of data recovery software and services out there.

2. If you decide to go the freeware or shareware, whatever data recovery tool you try just try to use one that DOES NOT REQUIRE INSTALLATION. That's right, the software should run right off floppy, flash or CD. For recovery software that requires installation, you must have a second drive! Otherwise, installation of the recovery software will just permanently overwrite your data.

Here's the list of freeware data recovery tools:


NTFS-reader:

NTFS Boot Disk provides access to your NTFS drives in an MS-DOS environment (long filenames are supported). NTFS Reader for DOS will allow you to browse and recover all kinds of deleted files.

Although it looks rudimentary, the DOSishness is actually a real boon since Windows isn't running and mucking up your data with disk swapping. NTFS provides good data browsing and preview functionality and runs straight from a boot disk (which you should make on another computer).


PC-Inspector File Recovery
PC Inspector File Recovery is a data recovery program with support for FAT 12/16/32 and NTFS file systems. It recovers files with the original time and date stamp, and can optionally restore them to a network drive and can recover many files, even when a header entry is no longer available. On FAT systems, the programs finds partitions automatically, even if the boot sector or FAT has been erased or damaged. PC Inspector File Recovery offers an easy to use interface that will scan your drive and automatically make files that can be recovered available from a "Deleted" folder in an Explorer Style navigation tree.

To be able to use PC Inspector File Recovery you need a working Windows System. Never install the current version on the drive from which you intend to recover data! The program must be installed and run on a second, independent drive.


Restoration:

Restoration is an easy to use and straight forward tool to undelete files that were removed from the recycle bin or directly deleted from within Windows. Upon start, you can scan for all files that may be recovered and also limit the results by entering a search term or extension.

In addition, Restoration also provides an option to wipe the found files beyond simple recovery. And as such it is not only a data-recovery tool but also a security cleanup application. You can use it to totally delete your files so that no recovery is possible.

The program is very small and completely stand-alone, it does not require installation and can also run from a Floppy disk. Restoration works with FAT and NTFS as well as digital cameras cards.


Read the rest of this entry...

Bookmark and Share My Zimbio http://www.wikio.com

Sunday, June 14, 2009

Custom Firmware 5.50GEN-a Released + Build 4 for Slim Users

In my llast post PSP-3000 CFW Gen-A I've mentioned the release of the CFW for PSP3000 now the same team have released their custom firmware 5.50GEN-a, the only custom firmware compatible with the latest and greatest PSP firmware 5.50. This custom firmware works both on PSP phats and PSP slims with with TA-088 v1 and v2 motherboards.

Plus they have already released build 4 to fix a bug that alot of PSP slim users have been affected by to do with PSN network bug.

Here is a list of all the new features included in this brilliant firmware:

* Support for functions of official Firmware 5.50
* Functions standby reset and Pandora have been removed
* The plug-in Bubbletune to classify games according to category was deleted
* Patch Slim Colors Bubbletunes was deleted
* The pops is functional (emulation of PS1 games to work)
* The custom firmware 5.50GEN-A supports the launch of ISO and of PS1 games
* Popsloader and all plugins are normally incurred.
* The option “hide your MAC address is always available in the recovery

Along with this, the developers of this have said that they shall release a popsloader and POPSPLOADER, CXMB, 1.50 Addon, PSARdumper all for this new firmware very soon. Plus they say they are working on a 5.51GEN-a custom firmware to keep up with the times.

There are two downloads. The first one includes the Build 4 fix so if you haven’t already got the 5.50GEN-a on your PSP, download that. If you already have the firmware but are experiencing the bug, download the second file which will update you to build 4.

To install simply place the folder inside the PSP/Game/ folder in the zip file onto your PSP in the PSP/Game/ folder.

Downloads:

* 5.50GEN-a Custom Firmware
* 5.50GEN-a Build 4 Updater

Read the rest of this entry...

Bookmark and Share My Zimbio http://www.wikio.com

Saturday, June 13, 2009

Linux RAID and LVM Management

What is RAID and LVM
RAID is usually defined as Redundant Array of Inexpensive disks. It is normally used to spread data among several physical hard drives with enough redundancy that should any drive fail the data will still be intact. Once created a RAID array appears to be one device which can be used pretty much like a regular partition. There are several kinds of RAID but I will only refer to the two most common here.

The first is RAID-1 which is also known as mirroring. With RAID-1 it's basically done with two essentially identical drives, each with a complete set of data. The second, the one I will mostly refer to in this guide is RAID-5 which is set up using three or more drives with the data spread in a way that any one drive failing will not result in data loss. The Red Hat website has a great overview of the RAID Levels.

There is one limitation with Linux Software RAID that a /boot partition can only reside on a RAID-1 array.

Linux supports both several hardware RAID devices but also software RAID which allows you to use any IDE or SCSI drives as the physical devices. In all cases I'll refer to software RAID.

LVM stands for Logical Volume Manager and is a way of grouping drives and/or partition in a way where instead of dealing with hard and fast physical partitions the data is managed in a virtual basis where the virtual partitions can be resized. The Red Hat website has a great overview of the Logical Volume Manager.

There is one limitation that a LVM cannot be used for the /boot.


Initial set of a RAID-5 array
It is recommend you experiment with setting up and managing RAID and LVM systems before using it on an important filesystem. One way to do it was to take old hard drive and create a bunch of partitions on it (8 or so should be enough) and try combining them into RAID arrays. In this testing I created two RAID-5 arrays each with 3 partitions. You can then manually fail and hot remove the partitions from the array and then add them back to see how the recovery process works. You'll get a warning about the partitions sharing a physical disc but you can ignore that since it's only for experimentation.

In this case we have two systems with RAID arrays, one with two 73G SCSI drives running RAID-1 (mirroring) and my other test system is configured with three 120G IDE drives running RAID-5. In most cases I will refer to my RAID-5 configuration as that will be more typical.

Have an extra IDE controller in your system to allow you to support the use of more than 4 IDE devices which caused a very odd drive assignment. The order doesn't seem to bother the Linux kernel so it doesn't bother me. The basic configurationis below:

hda 120G drive
hdb 120G drive
hde 60G boot drive not on RAID array
hdf 120G drive
hdg CD-ROM drive

The first step is to create the physical partitions on each drive that will be part of the RAID array. In my case I want to use each 120G drive in the array in it's entirety. All the drives are partitioned identically,for example: this is how hda is partitioned:

Disk /dev/hda: 120.0 GB, 120034123776 bytes
16 heads, 63 sectors/track, 232581 cylinders
Units = cylinders of 1008 * 512 = 516096 bytes

Device Boot Start End Blocks Id System
/dev/hda1 * 1 232581 117220792+ fd Linux raid autodetect

So now with all three drives with a partitioned with id fd Linux raid autodetect you can go ahead and combine the partitions into a RAID array:

# /sbin/mdadm --create --verbose /dev/md0 --level=5 --raid-devices=3 \
/dev/hdb1 /dev/hda1 /dev/hdf1

Great!, that was easy. That command created a special device /dev/md0 which can be used instead of a physical partition. You can check on the status of that RAID array with the mdadm command:

# /sbin/mdadm --detail /dev/md0
Version : 00.90.01
Creation Time : Wed May 11 20:00:18 2005
Raid Level : raid5
Array Size : 234436352 (223.58 GiB 240.06 GB)
Device Size : 117218176 (111.79 GiB 120.03 GB)
Raid Devices : 3
Total Devices : 3
Preferred Minor : 0
Persistence : Superblock is persistent

Update Time : Fri Jun 10 04:13:11 2005
State : clean
Active Devices : 3
Working Devices : 3
Failed Devices : 0
Spare Devices : 0

Layout : left-symmetric
Chunk Size : 64K

UUID : 36161bdd:a9018a79:60e0757a:e27bb7ca
Events : 0.10670

Number Major Minor RaidDevice State
0 3 1 0 active sync /dev/hda1
1 3 65 1 active sync /dev/hdb1
2 33 65 2 active sync /dev/hdf1

The important lines to see are the State line which should say clean otherwise there might be a problem. At the bottom you should make sure that the State column always says active sync which says each device is actively in the array. You could potentially have a spare device that's on-hand should any drive should fail. If you have a spare you'll see it listed as such here.

One thing you'll see above if you're paying attention is the fact that the size of the array is 240G but I have three 120G drives as part of the array. That's because the extra space is used as extra parity data that is needed to survive the failure of one of the drives.

Initial set of LVM on top of RAID
Now that we have /dev/md0 device you can create a Logical Volume on top of it. Why would you want to do that? If I were to build an ext3 filesystem on top of the RAID device and someday wanted to increase it's capacity I wouldn't be able to do that without backing up the data, building a new RAID array and restoring my data. Using LVM allows me to expand (or contract) the size of the filesystem without disturbing the existing data.

Anyway, here are the steps to then add this RAID array to the LVM system. The first command pvcreate will "initialize a disk or partition for use by LVM". The second command vgcreate will then create the Volume Group, in my case I called it lvm-raid:

# pvcreate /dev/md0
# vgcreate lvm-raid /dev/md0

The default value for the physical extent size can be too low for a large RAID array. In those cases you'll need to specify the -s option with a larger than default physical extent size. The default is only 4MB as of the version in Fedora Core 5. The maximum number of physical extents is approximately 65k so take your maximum volume size and divide it by 65k then round it to the next nice round number. For example, to successfully create a 550G RAID let's figure that's approximately 550,000 megabytes and divide by 65,000 which gives you roughly 8.46. Round it up to the next nice round number and use 16M (for 16 megabytes) as the physical extent size and you'll be fine:

# vgcreate -s 16M

Ok, you've created a blank receptacle but now you have to tell how many Physical Extents from the physical device (/dev/md0 in this case) will be allocated to this Volume Group. In my case I wanted all the data from /dev/md0 to be allocated to this Volume Group. If later I wanted to add additional space I would create a new RAID array and add that physical device to this Volume Group.

To find out how many PEs are available to me use the vgdisplay command to find out how many are available and now I can create a Logical Volume using all (or some) of the space in the Volume Group. In my case I call the Logical Volume lvm0.

# vgdisplay lvm-raid
.
.
Free PE / Size 57235 / 223.57 GB
# lvcreate -l 57235 lvm-raid -n lvm0

In the end you will have a device you can use very much like a plain 'ol partition called /dev/lvm-raid/lvm0. You can now check on the status of the Logical Volume with the lvdisplay command. The device can then be used to to create a filesystem on.

# lvdisplay /dev/lvm-raid/lvm0
--- Logical volume ---
LV Name /dev/lvm-raid/lvm0
VG Name lvm-raid
LV UUID FFX673-dGlX-tsEL-6UXl-1hLs-6b3Y-rkO9O2
LV Write Access read/write
LV Status available
# open 1
LV Size 223.57 GB
Current LE 57235
Segments 1
Allocation inherit
Read ahead sectors 0
Block device 253:2
# mkfs.ext3 /dev/lvm-raid/lvm0
.
.
# mount /dev/lvm-raid/lvm0 /mnt
# df -h /mnt
Filesystem Size Used Avail Use% Mounted on
/dev/mapper/lvm--raid-lvm0
224G 93M 224G 1% /mnt

Handling a Drive Failure
As everything eventually does break (some sooner than others) a drive in the array will fail. It is a very good idea to run smartd on all drives in your array (and probably ALL drives period) to be notified of a failure or a pending failure as soon as possible. You can also manually fail a partition, meaning to take it out of the RAID array, with the following command:

# /sbin/mdadm /dev/md0 -f /dev/hdb1
mdadm: set /dev/hdb1 faulty in /dev/md0

Once the system has determined a drive has failed or is otherwise missing (you can shut down and pull out a drive and reboot to similate a drive failure or use the command to manually fail a drive above it will show something like this in mdadm:

# /sbin/mdadm --detail /dev/md0
Update Time : Wed Jun 15 11:30:59 2005
State : clean, degraded
Active Devices : 2
Working Devices : 2
Failed Devices : 1
Spare Devices : 0
.
.
Number Major Minor RaidDevice State
0 3 1 0 active sync /dev/hda1
1 0 0 - removed
2 33 65 2 active sync /dev/hdf1

You'll notice in this case I had /dev/hdb fail. I replaced it with a new drive with the same capacity and was able to add it back to the array. The first step is to partition the new drive just like when first creating the array. Then you can simply add the partition back to the array and watch the status as the data is rebuilt onto the newly replace drive.

# /sbin/mdadm /dev/md0 -a /dev/hdb1
# /sbin/mdadm --detail /dev/md0
Update Time : Wed Jun 15 12:11:23 2005
State : clean, degraded, recovering
Active Devices : 2
Working Devices : 3
Failed Devices : 0
Spare Devices : 1

Layout : left-symmetric
Chunk Size : 64K

Rebuild Status : 2% complete
.
.

During the rebuild process the system performance may be somewhat impacted but the data should remain in-tact.
Expanding an Array/Filesytem

I'm told it's now possible to expand the size of a RAID array much as you could on a commercial array such as the NetApp. The link below describes the procedure. I have yet to try it but it looks promising:

Growing a RAID5 array - http://scotgate.org/?p=107

Read the rest of this entry...

Bookmark and Share My Zimbio http://www.wikio.com

Friday, June 12, 2009

PSP-3000 CFW GEN-A

Was busy looking around for gaming accessories last week for my portable and overheard someone asking on how much it will cost for his PSP-3000 to be installed a custom firmware.

I was suprised to know that a CFW is now available for the PSP-3000. Apparently it was just released last June 6,2009. No, it’s not the next M33 CFW — it’s Custom Firmware 5.03GEN-A for Team Typhoon’s ChickHEN.

It offers all the benefits of 5.02GEN-A, plus the following –

* PSP-3000 and PSP-2000 v3 Support
* PSOne Game Support
* ISO/UMD Backup Support
* GEN VSH MENU
* Recovery in VSH available (some bugs remain - see the README)
* Access to PSN


How to install 5.03GEN-A:

1. Connect your PSP to the computer via USB when you have loaded ChickHEN R2
2. Unzip 5.03GEN-A
3. Double click on “LAUNCH-ME.exe” (GUI)
4. PSP Model: depending on your PSP, choose the option PSP-2000 or PSP-3000
5. Mode: Choose option FULL
6. PSP Install: Choose option YES
7. Push START
8. The files are copied on your PSP
9. Disconnect the PSP from USB
10. Launch the main EBOOT.PBP using ChickHEN R2 (only R2! NOT R1!).
11. When the app loads, press L or R to flash the firmware in your flash. YOU ONLY NEED MAKE IT ONE TIME!
12. Press CIRCLE to reboot in the custom firmware.

Download:
ChickHEN R2
Custom Firmware 5.03GEN-A for ChickHEN R2

Read the rest of this entry...

Bookmark and Share My Zimbio http://www.wikio.com

Thursday, June 11, 2009

Howto:Step-by-Step Zone Configuration in the Solaris 10 OS

Somebody who have been reading my post Solaris Zones CBT Notes sent me a message if I can provide a step by step howto regarding zone configuration in Solaris 10. I was going to use my test machine in creating the guide but was able to find a much clearer article written by Diego E. Aguirre and rather than re-inventing the wheel, I've provided it here.

Here is a short guide to creating zones with Solaris Containers technology, with examples using Solaris Volume Manager and an Oracle database. It's easy to modify these steps and add more file systems into the script.

Notes: In this example, I make only one instance or zone, called zone1. I used Solaris Volume Manager in Steps 2 and 3, and I tested this on Oracle 10.1 and 10.2.

1. Format the hard disk into slice 0.

2. Make the meta devices. For example, I have three SAN disks, and I want to make a meta device with the three disks concatenated. (Note: Please type the command all on one line.)

# metainit d60 3 1 c2t50060E800456EE02d0s0 1 c2t50060E800456EE02d1s0
1 c2t50060E800456EE02d2s0
d60: Concat/Stripe is setup

3. Make the soft partitions:

# metainit d61 -p d60 6g
d61: Soft Partition is setup
# metainit d62 -p d60 10g
d62: Soft Partition is setup
# metainit d63 -p d60 30g
d63: Soft Partition is setup
#

4. Create the file systems:

# newfs /dev/md/rdsk/d61
newfs: construct a new file system /dev/md/rdsk/d61: (y/n)? y
# newfs /dev/md/rdsk/d62
newfs: construct a new file system /dev/md/rdsk/d62: (y/n)? y
# newfs /dev/md/rdsk/d63
newfs: construct a new file system /dev/md/rdsk/d63: (y/n)? y
#

5. Create the mount point for the root file system (/ fs) and /u00 and /u01 for the Oracle database.


mkdir -p /export/zone1
mkdir /u00
mkdir /u01
mount /export/zone1

6. Execute the following script, which is shown in its entirety after Step 11.

zonecfg -z zone1 -f /usr/scripts/make.zone1.ksh

# zoneadm list -cv
ID NAME STATUS PATH
0 global running /
- zone1 configured /export/zone1
# chmod 700 /export/zone1

7. Install zone1:

# zoneadm -z zone1 install
Preparing to install zone <zone1>.
Checking <ufs> file system on device </dev/md/rdsk/d62>
to be mounted at </export/zone1/root>
Checking <ufs> file system on device </dev/md/rdsk/d63>
to be mounted at </export/zone1/root>
Creating list of files to copy from the global zone.
Copying <124550> files to the zone.
Initializing zone product registry.
Determining zone package initialization order.
Preparing to initialize <1021> packages on the zone.
Initializing package <49> of <1021>: percent complete: 4%

8. Run the following command to get the zone state:

# zoneadm list -cv
ID NAME STATUS PATH
0 global running /
- zone1 installed /export/zone1

9. Transition the zone to the ready state by running the following command:

# zoneadm -z zone1 ready

10. Use the following command to get the zone state:

# zoneadm list -cv
ID NAME STATUS PATH
0 global running /
1 zone1 ready /export/zone1

11. Boot the zone:

# zoneadm -z zone1 boot

The script to be executed is /usr/scripts/make.zone1.ksh, and here are the details:

create -b
set zonepath=/export/zone1
set autoboot=true
add fs
set dir=/u00
set special=/dev/md/dsk/d62
set raw=/dev/md/rdsk/d62
set type=ufs
end
add fs
set dir=/u01
set special=/dev/md/dsk/d63
set raw=/dev/md/rdsk/d63
set type=ufs
end
add net
set address=10.11.33.144
set physical=ce2
end

Read the rest of this entry...

Bookmark and Share My Zimbio http://www.wikio.com

Wednesday, June 10, 2009

Common Oracle installation errors with Linux

Found this great generic installation problems on Linux with possible solutions and thought of posting thm here for easy reference.

Thanks to Rohit Gupta who originally posted this, you may visit his site for updates.

1. Installation can fail during linking phase with errors like "errors in invoking target Install_isqlplus of makefile /u01/app/oracle/product/9.2.0.7/sqlplus/lib/ins_sqlplus.mk"

Reason/Resolution: Linking problems are usually associated with incorrect version of gcc packages of your OS version.

For 9i installation, gcc version should be 3.2.3 and for 10g installation, it should be 3.4.6. You can check the version by the command "gcc -v". Usually, 3.4.6 is the default.

For activating correct gcc version for 9i installation on 32bit OS (i386):

$ mv /usr/bin/gcc /usr/bin/gcc.orig
$ mv /usr/bin/g++ /usr/bin/g++.orig
$ ln -s /usr/bin/i386-redhat-linux-gcc32 /usr/bin/gcc
$ ln -s /usr/bin/i386-redhat-linux-g++32 /usr/bin/g++

For activating correct gcc version for 9i installation on 64bit OS (x86_64):

$ mv /usr/bin/gcc /usr/bin/gcc.orig
$ mv /usr/bin/g++ /usr/bin/g++.orig
$ ln -s /usr/bin/x86_64-redhat-linux-gcc32 /usr/bin/gcc
$ ln -s /usr/bin/x86_64-redhat-linux-g++32 /usr/bin/g++

Refer to Metalink Note: 353529.1 and 169706.1 for installation pre-requisites


2. "There is no non-empty value for variable s_jservPort under section Ports in file /u01/app/oracle/product/9.2.0/Apache/ports.ini"

Reason/Resolution: This problem is usually encountered when you are making a second attempt for installing the software after a failed previous installation. This is an ignorable error. If you open the file : /u01/app/oracle/product/9.2.0/Apache/ports.ini , you will see that the "s_jservPort " might be defined above the "Ports" section . We need to just place this variable under "ports" section. In case you are not using IAS or Grid Control, you can safely ignore this error or do the settings manually as mentioned above. In any case there should be no operational impacts on the database.


3. Errors in writing few files like "error in writing to file /u01/app/oracle/product/9.2.0/Apache/Apache/conf/ssl.key/server.key"

Reason/Resolution: Again, This problem is usually encountered when you are making a second attempt for installing the software after a failed previous installation. The files mentioned in these errors are actually created during the previous attempt and can not be overwritten because they are created as read only while installation. So to proceed with the installation, you need to change the permissions on these files (using chmod) to make them writable. Even better solution is that before starting the installation again, remove the Oracle_Home completely which was created and populated during the previous attempt for installation, and create a fresh and empty directory for Oracle_Home


4. "Error occurred during initialization of VM
Unable to load native library: /tmp/OraInstall2003-10-25_03-14-57PM/jre/lib/i386/libjava.so: symbol __libc_wait, version GLIBC_2.0 not defined in file libc.so.6 with link time reference"

Reason/Resolution: To resolve the __libc_wait symbol issue, download the p3006854_9204 patch p3006854_9204_LINUX.zip from http://metalink.oracle.com/. See bug 3006854 for more information. To apply the patch, run

su - root
# unzip p3006854_9204_LINUX.zip
Archive: p3006854_9204_LINUX.zip
creating: 3006854/
inflating: 3006854/rhel3_pre_install.sh
inflating: 3006854/README.txt
# cd 3006854
# sh rhel3_pre_install.sh
Applying patch...
Patch successfully applied
#


5. OUI Hangs at 18% - "Copying naeet.o"

Reason/Resolution: The reason is that environment variable LD_ASSUME_KERNEL has not been set. Check the metalink notes:

Note: 360142.1: When Running OUI, OUI Hangs at 18% Copying naeet.o
Note: 377217.1: What should the value of LD_ASSUME_KERNEL be set to for Linux?


Problems specific to 9i RAC installation:


1. On starting the ORACM service, you can get the error
ocmstart.sh: Error: Restart is too frequent
ocmstart.sh: Info: Check the system configuration and fix the problem.
ocmstart.sh: Info: After you fixed the problem, remove the timestamp file
ocmstart.sh: Info: "/u01/app/oracle/product/9.2.0.7/oracm/log/ocmstart.ts"

Reason/Resolution: To resolve this, remove the file $ORACLE_HOME/oracm/log/osmstart.ts and then you should be able to start the service.


2. During installation of CM patch set (like 9207 patchset or 9208 patchset), following error: "error in writing to file '/u01/app/oracle/product/9.2.0.7/oracm/bin/oracm (text file busy)"

Reason/Resolution: This error occurs if you are trying to install the CM patch set without stopping the ORACM service. ORACM services on both nodes should be stopped before installing the CM patch set.


3. After installing Cluster manager, ORACM service should be started on all nodes to proceed with the RDBMS installation. I have faced this situation personally that service does not starts on both nodes. For example, if it is a 2 nodes RAC, service could be started on one node only. Starting the service on one node kills the service on other node.

Reason/Resolution: The service has to be started as root and requires the LD_ASSUME_KERNEL to be set correctly. So i had set the LD_ASSUME_KERNEL properly as "oracle" user and when switching to "root" user to start the service, i was doing "su -" instead of "su". "su -" does not carries over the environment settings and hence value of LD_ASSUME_KERNEL was not carried over to the user "root"


4. When trying to apply the 9208 CM patch set, all nodes were not considered by the installation. Following error was found in the installation logs:

"Cluster nodes cannot be retrieved from the vendor clusterware (/tmp/OraInstall2008-03-20_12-12-02AM/oui/bin/lsnodes.bin: error while loading shared libraries: libcmdll.so: cannot open shared object file: No such file or directory). This system will not be considered as a vendor clusterware"

Also, "lsnodes" command, which can be used to verify all the nodes in the RAC was failing.

Reason/Resolution: Actually the correct order to be followed to install the 9208 RAC should be:

--> 9204 CM
--> 9204 RDBMS
--> 9208 CM Patchset
--> 9208 RDBMS patchset.

The reason for the above error and "lsnodes" failing is that $ORACLE_HOME/lib32 directory does not exist. The file libcmdll.so mentioned in the error is located inside the lib32 directory and lib32 is created only after the installation of RDBMS software and not the CM. So if you don't follow the correct order and try to install 9208 CM patchset after 9204 CM, you'll get this error and "lsnodes" will also not work to show all the nodes in the cluster (which you assume should be there after you have installed 9204 CM successfully). Instead after 9204, you should be installing 9204 RDBMS software. Then if you apply the 9208 patchset, this error won't be seen and "lsnodes" will also work.


5. Always check the inventory on all nodes to verify that correct versions of CM and RDBMS patchsets have been applied on all nodes. Inventory can be verified by launching OUI. The abnormality in versions is more prevalent in CM patchsets where if you apply 9208 CM patchset on one node, the CM version on other node is still 9204. However, this can be true for RDBMS patchsets also. So in such cases, you need to apply the patchset on other node also separately (ideally all the installation in RAC happens from a single node only and other nodes are updated automatically) to have the correct version. You can check the version of CM on each node by following command after starting the ORACM service:

$ head -1 $ORACLE_HOME/oracm/log/cm.log

Read the rest of this entry...

Bookmark and Share My Zimbio http://www.wikio.com

Tuesday, June 9, 2009

New iPhone unveiled by Apple

Apple on Monday unveiled a new iPhone faster, lower the price of their existing model to $ 99, and released details of its new operating system.

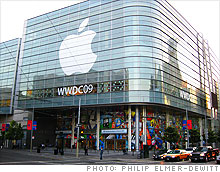
However, Apple (AAPL, Fortune 500) CEO Steve Jobs was not presented to the company's World Wide Developers Conference in San Francisco, where the company presents its products.

By contrast, Philip Schiller, company Senior Vice President of product marketing throughout the world, demonstrated the new iPhone 3G S, which can perform up to 3.6 times faster than the previous, second generation iPhone, iPhone 3G.


Shares of Apple, which declined as much as $ 5.24 earlier, were $ 2.07 lower at $ 142.60 after the presentation. They ended the day by 82 cents, to $ 143.85.

The iPhone will come in three sizes and prices. The new phone will have a 16 gigabyte model for $ 199 and a 32-gigibyte version of $ 299. Apple will sell a second-generation iPhone 3G 8 gigabytes of memory for $ 99 - but the cheapest price for the device.

Prices are subsidized by AT & T (T, Fortune 500), the exclusive wireless carrier for the phone to customers signing new contracts.

The new phone also comes with a 3 megapixel camera with video capture and editing capabilities, with improved battery life up to 12 hours of talk time and 30 hours of audio, voice command and control by holding the home and one - in digital compass.

IPhone OS: Apple also demonstrated its new operating system for the iPhone, after days of competitor Palm (PALM) has launched its very Ballyhoo Pre phone.

The new iPhone OS 3.0, which was released in March, have been cut, copy and paste the capacity of all applications for iPhone users who have always demanded. The operating system will also feature a gesture to undo, to undo the last action by shaking the phone.

"Apple in a different environment now than when it launched the iPhone, as there are several dealers with best deals," said Edward Zabitzky, Apple Research analyst ACI. "Apple does not really change much the platform, but the net result is that given the competitiveness."

Fully integrated search, text messaging and multimedia auto-fill passwords have also been added for the iPhone, although the multimedia text messages will not be available in AT & T (T, Fortune 500) until later in the summer .

The new operating system will allow users to rent and buy movies directly from their phones with iTunes, and have the parental control functionality.

Snow Leopard: Apple said that its new operating system, Snow Leopard, will be available in September and may do some work up to 90% faster than the current operating system Leopard. Apple said Snow Leopard is more shock resistant than its predecessor and is smaller 6GB.

Rival Microsoft (MSFT, Fortune 500) said its new operating system Windows 7 will be released in October.

Snow Leopard will cost $ 29 to upgrade to Leopard, which is $ 100 less than the previous price of Apple.

Apple also unveiled a new and faster browser Safari. Safari 4 can track changes in many of the most visited websites, and use the iTunes "Cover Flow" to explore the interaction through the browser history.

The company redesigned its Quicktime video viewer and editor, giving users the ability to share videos on YouTube, iTunes and MobileMe, which allows playback on iPhone.

New MacBook: The new 13-inch and 15 inch MacBook Pros is both a 3.06 GHz Intel Core Duo processor, the fastest processor Apple has ever used.

Like most 17-inch MacBook Pro, the 15-inch will also feature a new lithium battery that gets up to seven hours of battery life and three times the recharge of most laptops.

The company announced the MacBook Air will cost $ 1,499, a price cut of $ 700. A 13-inch MacBook Pro costs $ 100 less than $ 1199, and 15-inch and 17 inch MacBook Pro will be $ 300 cheaper at $ 1699 and $ 2499 respectively.

The company offers a low price NETBOOK, as some had expected, but analysts cheered the move.

"They should not compete in the world NETBOOK because diminished brand value," said Zabitzky. "It would be foolish for Apple to go after short-term gain long term pain."

Jobs, who has been on leave due to illness, is expected to return to work at the end of the month.

Read the rest of this entry...

Bookmark and Share My Zimbio http://www.wikio.com

Monday, June 8, 2009

Howto: Setup LVM on 3 SCSI Disk

This setup has three SCSI disks that will be put into a logical volume using LVM. The disks are at /dev/sda, /dev/sdb, and /dev/sdc. This can serve as a sample for setting up LVM on three storage devices.

Before you can use a disk in a volume group you will have to prepare it:

Run pvcreate on the disks

# pvcreate /dev/sda
# pvcreate /dev/sdb
# pvcreate /dev/sdc

This creates a volume group descriptor area (VGDA) at the start of the disks.

Setup a Volume Group:
1.Create a volume group
# vgcreate my_volume_group /dev/sda /dev/sdb /dev/sdc/


2. Run vgdisplay to verify volume group

# vgdisplay
# vgdisplay
--- Volume Group ---
VG Name my_volume_group
VG Access read/write
VG Status available/resizable
VG # 1
MAX LV 256
Cur LV 0
Open LV 0
MAX LV Size 255.99 GB
Max PV 256
Cur PV 3
Act PV 3
VG Size 1.45 GB
PE Size 4 MB
Total PE 372
Alloc PE / Size 0 / 0
Free PE / Size 372/ 1.45 GB
VG UUID nP2PY5-5TOS-hLx0-FDu0-2a6N-f37x-0BME0Y


The most important things to verify are that the first three items are correct and that the VG Size item is the proper size for the amount of space in all four of your disks.

Creating the Logical Volume

If the volume group looks correct, it is time to create a logical volume on top of the volume group.

You can make the logical volume any size you like. (It is similar to a partition on a non LVM setup.) For this example we will create just a single logical volume of size 1GB on the volume group. We will not use striping because it is not currently possible to add a disk to a stripe set after the logical volume is created.

# lvcreate -L1G -nmy_logical_volume my_volume_group
lvcreate -- doing automatic backup of "my_volume_group"
lvcreate -- logical volume "/dev/my_volume_group/my_logical_volume" successfully created


Create the File System

Create an ext2 file system on the logical volume

# mke2fs /dev/my_volume_group/my_logical_volume
mke2fs 1.19, 13-Jul-2000 for EXT2 FS 0.5b, 95/08/09
Filesystem label=
OS type: Linux
Block size=4096 (log=2)
Fragment size=4096 (log=2)
131072 inodes, 262144 blocks
13107 blocks (5.00%) reserved for the super user
First data block=0
9 block groups
32768 blocks per group, 32768 fragments per group
16384 inodes per group
Superblock backups stored on blocks:
32768, 98304, 163840, 229376

Writing inode tables: done
Writing superblocks and filesystem accounting information: done


Test the File System

Mount the logical volume and check to make sure everything looks correct

# mount /dev/my_volume_group/my_logical_volume /mnt
# df
Filesystem 1k-blocks Used Available Use% Mounted on
/dev/hda1 1311552 628824 616104 51% /
/dev/my_volume_group/my_logical_volume
1040132 20 987276 0% /mnt


If everything went well, you should now have a logical volume with and ext2 file system mounted at /mnt.

Read the rest of this entry...

Bookmark and Share My Zimbio http://www.wikio.com

Sunday, June 7, 2009

Howto: Solaris 10 RAM Disk Image Creation

Many people have heard of RAM and disk images used in Linux, but did you know you can do the same with Solaris 10? Well, it's a little known fact, but you can, it is excellent potential for the use of Solaris 10 or OpenSolaris on embedded devices or even in safety devices such as firewalls.

Here is a quick method (courtesy of Peter Buckingham in one of our internal aliases) in creating a RAM disk image under Solaris 10 for x86/x64 or OpenSolaris x86/x64:


1. Install Solaris on a system disk
2. Tar it
3. Edit /boot/solaris/bootenv.rc and eliminate "bootpath"
4. Edit /lib svc/method/fs-usr and change mountfs to remount / instead
5. Edit /etc/vfstab and
- A change rootfs to /devices/ramdisk: a
- Remove swap
- Remove /tmp so it's not swapped back
6. Now use the /boot/solaris/bin/root_archive command to build the RAM disk image:

For example:

# /boot/solaris/bin/root_archive pack solaris.img <directory>

where: <directory> Is the directory where you have your working file system

Now you have a RAM disk image, there is nothing really to stop loading the network through pxegrub/pxelinux, or from a local disk.

Read the rest of this entry...

Bookmark and Share My Zimbio http://www.wikio.com

Saturday, June 6, 2009

Linux(Debian) + Apache + MySQL + PHP/Perl Install

What you'll need:

* Apache 2 - Linux Web server
* MySQL 5 - MySQL Database Server
* PHP4/5 - PHP Scripting Language
* phpMyAdmin - Web-based database admin software.
* Webalizer - Website Traffic Analyzer
* Mail Server - Postfix (MTA) with Dovecot IMAP/POP3 + Sasl Authentication
* Squirrelmail - A web based email
* VSFTP - A fast ftp server to upload files
* Webmin - A freely available server control panel
* ClamAV - Antivirus software.
* A Firewall using IPtables.


The minimum requirement for Debian/Ubuntu version of linux with atleast 256MB of RAM available. Anything less than this minimum ram will cause lot of problems since you are running a server along especially mysql and webmin requires lot of RAM to run properly. Mysql will give you the error "cannot connect to mysql.sock" if you dont have enough memory in your server.


1. Installing Apache + PHP

If you want to use PHP 4, just apt-get:

apt-get install apache2 php4 libapache2-mod-php4


To install PHP5:

apt-get install apache2 php5 libapache2-mod-php5


The config file for Apache is located at: /etc/apache2/apache2.conf and the web folder is /var/www.

Check whether php is installed and running properly, just create a test.php in your /var/www folder with phpinfo() function:

vi /var/www/test.php

Put this in test.php:

<?php phpinfo(); ?>

To test php go to URL:

http://ip.address/test.php or http://domain/test.php


Enabling GD Library with PHP

If you want to use CAPTCHA or for dynamic image generation with php scripts for image verification to stop SPAM or automated robots, then it is absolutely necessary to get php gd library installed with php. Here is the command:

apt-get install php5-gd


Enabling Mod Rewrite with .htaccess

# a2enmod rewrite

In case you encouter the error "page not found 404 error" which is usually the case for debian/ubuntu versions follow below:

vi /etc/apache2/sites-enabled/000-default

find the following and change AllowOverride from None to All

<Directory /var/www/>
Options Indexes FollowSymLinks MultiViews
AllowOverride All
Order allow,deny
allow from all
# Uncomment this directive is you want to see apache2's
# default start page (in /apache2-default) when you go to /
#RedirectMatch ^/$ /apache2-default/
</Directory>

Upload the .htaccess file to your server and restart apache. /etc/init.d/apache2 restart

Make sure your .htaccess file has 644 permission as otherwise you get permission denied error.

2. Installing MySQL Database Server

Installing mysql database server is always necessary if you are running a database driven ecommerce site. Remember running mysql server to a fair extend requires atleast 256mb of RAM in your server. So unless you are running database driven sites you dont absolutely need mysql. The following commands will install mysql 5 server and mysql 5 client.

apt-get install mysql-server mysql-client php5-mysql

If you used php4:

apt-get install mysql-server mysql-client php4-mysql

The configuration file of mysql is located at: /etc/mysql/my.cnf


Creating users to use MySQL and Changing Root Password

change the root password:

mysql> USE mysql;
mysql> UPDATE user SET Password=PASSWORD('new-password') WHERE user='root';
mysql> FLUSH PRIVILEGES;


To Create User

You must never use root password, so you might need to create a user to connect to mysql database for a PHP script. Alternatively you can add users to mysql database by using a control panel like webmin or phpMyAdmin to easily create or assign database permission to users.


PhpMyAdmin Installation

All you need to do is:

apt-get install phpmyadmin

The phpmyadmin configuration file is located at: /etc/phpmyadmin folder.

To setup under apache all you need to do is include the following line in /etc/apache2/apache2.conf

Include /etc/phpmyadmin/apache.conf

Now restart apache: /etc/init.d/apache2 restart


3. Mail Server Installation

* Postfix (Mail Transfer Agent MTA)
* Dovecot (IMAP/POP3 Server)
* SASL Authentication with TLS (Authenticate before sending mail outside network in Outlook)
* Squirrel Mail (Popular Web based Email)


Note: If you install Postfix/Dovecot mail server you will ONLY be able to send mail within your network. You can only send mail externally if you install SASL authentication with TLS. As otherwise you get nasty "Relay Access Denied" error.


3a. Install Postfix MTA (Mail Transfer Agent)

install postfix package along with sasl with apt-get

apt-get install postfix postfix-tls libsasl2 sasl2-bin libsasl2-modules popa3d

During installation, postfix will ask for few questions like name of server and answer those questions by entering your domain name and select Internet site for postfix.

Postfix configuration file is located at:/etc/postfix/main.cf. You can edit this file using popular text editor nano /etc/postfix/main.cf

Start or Restart Postfix Server:

/etc/init.d/postfix restart
/etc/init.d/postfix stop
/etc/init.d/postfix start

3b. Install Dovecot

Dovecot is one of the popular POP3/IMAP server which needs MTA like Postfix to work properly.

apt-get install dovecot

In some linux versions, the above might not work so you can install by specifying individual package names.

apt-get install dovecot-imapd dovecot-pop3d dovecot-common

Dovecot configuration file is located at: /etc/dovecot/dovecot.conf

Before we proceed we need to make some changes with dovecot configuration file. Double check the following entries in the file if the values are entered properly.

vi /etc/dovecot/dovecot.conf

# specify protocols = imap imaps pop3 pop3s
protocols = pop3 imap
# uncomment this and change to no.
disable_plaintext_auth = no
pop3_uidl_format = %08Xu%08Xv

I have noticed that in some ubuntu versions, most of the above parameters are not specified. You will need to insert the values if not specified or left empty. If you dont uncomment and change disable_plaintext_auth to no, you will get "plain text authentication error" from outlook or mail clients.

Now, create a user to test our pop3 mail with outlook:

adduser <user_name>

Caution: Always create a separate user to test your mail or ftp. DO NOT LOGIN WITH ROOT ACCESS.

Restart Dovecot:

/etc/init.d/dovecot restart

Now, you can use your outlook express to test whether your new mail server is working or not. Just enter username: <user_name> with password in outlook.

Remember you will NOT be able to send email outside your network, you will be only be able to send within your domain or local network. If you attempt to send email you get nasty "relay access denied" error from outlook express. However, you should have no problems in receiving your email from outlook. Inorder to send email external email you will need to configure SASL authentication as described below.
3c. Configure SASL Authentication with TLS

SASL Configuration + TLS (Simple authentication security layer with transport layer security) used mainly to authenticate users before sending email to external server, thus restricting relay access. If your relay server is kept open, then spammers could use your mail server to send spam. It is very essential to protect your mail server from misuse.

Let us set up SMTP authentication for our users with postfix and dovecot.

Edit the postfix configuration file /etc/postfix/main.cf and enter the few lines to enable authentication of our users

smtpd_sasl_auth_enable = yes
smtpd_sasl_local_domain = yourdomain.com
smtpd_recipient_restrictions = permit_mynetworks,permit_sasl_authenticated,reject_unauth_destination
smtpd_sasl_security_options = noanonymous

On the Dovecot side you also need to specify the dovecot authentication daemon socket. In this case we specify an absolute pathname. Refer to this postfix manual here

Edit /etc/dovecot/dovecot.conf

Look for the line that starts with auth default, before that insert the lines below.

auth default {
mechanisms = plain login
passdb pam {
}
userdb passwd {
}
socket listen {
client {
path = /var/spool/postfix/private/auth
mode = 0660
user = postfix
group = postfix
}
}
}

Now, rename previous auth default to auth default2. If you dont rename this then dovecot server will give you error like multiple instances of auth default.

Now restart all the components of mail server.

/etc/init.d/saslauthd restart
/etc/init.d/postfix restart
/etc/init.d/dovecot restart

Test whether your mail server works or not with your outlook express. Configure a user with a user name <user_name> (without @domain) and make sure that you select my server requires authentication. Under settings select same as incoming mail server


Read the rest of this entry...

Bookmark and Share My Zimbio http://www.wikio.com

UNIX at 40

"Forty years ago this summer, Ken Thompson sat down and wrote a small operating system that would eventually be called Unix. An article at ComputerWorld describes the history, present, and future of what could arguably be called the most important operating system of them all. 'Thompson and a colleague, Dennis Ritchie, had been feeling adrift since Bell Labs had withdrawn earlier in the year from a troubled project to develop a time-sharing system called Multics (Multiplexed Information and Computing Service). They had no desire to stick with any of the batch operating systems that predominated at the time, nor did they want to reinvent Multics, which they saw as grotesque and unwieldy. After batting around some ideas for a new system, Thompson wrote the first version of Unix, which the pair would continue to develop over the next several years with the help of colleagues Doug McIlroy, Joe Ossanna and Rudd Canaday.'"

In early 1969, Bell Labs had withdrawn from a troubled project to develop a time-sharing system called Multics (Multiplexed Information and Computing Service).

Thompson and a colleague, Dennis Ritchie, had no desire to stick with any of the batch operating systems that predominated at the time, nor did they want to reinvent Multics, which they saw as grotesque and unwieldy.

So in August Thompson wrote the first version of Unix in assembly language for a Digital Equipment Corp (DEC) PDP-7 minicomputer, spending one week each on the operating system, a shell, an editor and an assembler.

Over the next several years, Thompson and Ritchie, with the help of colleagues Doug McIlroy, Joe Ossanna and Rudd Canaday, developed the system further. Some of the principles of Multics were carried over into their new operating system, but the beauty of Unix then (if not now) lay in its less-is-more philosophy.

"A powerful operating system for interactive use need not be expensive either in equipment or in human effort," Ritchie and Thompson would write five years later in the Communications of the ACM (CACM), the journal of the Association for Computing Machinery.

"[We hope that] users of Unix will find that the most important characteristics of the system are its simplicity, elegance, and ease of use."

Apparently they did. Unix would go on to become a cornerstone of IT, widely deployed to run servers and workstations in universities, government facilities and corporations.

And its influence spread even farther than its actual deployments, as the ACM said in 1983 when it gave Thompson and Ritchie its top prize, the A.M. Turing Award for contributions to IT. "The model of the Unix system has led a generation of software designers to new ways of thinking about programming."

Read the rest of this entry...

Bookmark and Share My Zimbio http://www.wikio.com

Thursday, June 4, 2009

New Debian/Ubuntu image install howto

Some old note I gathered for installing a new debian/ubuntu image. This may be somewhat general and a better versionmay be available somewhere :). Do check it out.

apt-get install debootstrap
debootstrap --arch i386 [ubuntu version] /vz/private/1?? http://archive.ubuntulinux.org/ubuntu
vzctl set 1?? --applyconfig vps.basic --save

Set the name of the template:
echo "OSTEMPLATE=ubuntu-?.?" >> /etc/vz/1??.conf

# Ignore this if it shows - Warning: configuration file for distribution ubuntu-?-? not found default used

vzctl set 1?? --ipadd 192.168.x.y --save
vzctl set 1?? --nameserver 192.168.x.z --save

Update the sources list in /vz/private/1??/etc/apt/sources.list if needed

vzctl start 1??

vzctl exec 1?? apt-get update
vzctl exec 1?? apt-get -u upgrade
vzctl exec 1?? apt-get install ssh libedit2 openssh-client openssh-server

vzctl exec 1?? sed -i -e '/getty/d' /etc/inittab

vzctl exec 1?? rm -f /etc/mtab
vzctl exec 1?? ln -s /proc/mounts /etc/mtab

### Now the vps is ready to either run or to create a template

vzctl set 1?? --ipdel all --save
vzctl stop 1??

cd /vz/private/1??
tar czf /vz/template/cache/ubuntu-?.?-minimal.tar.gz .

# now cleanup
vzctl destroy 1??

To deploy use -
vzctl create 10? --ostemplate ubuntu-?.?-minimal --config vps.basic

Read the rest of this entry...

Bookmark and Share My Zimbio http://www.wikio.com

Wednesday, June 3, 2009

Apache Virtual Hosts

I've received several pm's on how to create virtual hosts via Apache, so I decided to give an sample Apache virtual host config so they can have something to start with

For a more complete detail on configuring virtual hosts in Apache you can get a complete guide via Google.

Thanks for the messages, the Apache virtual host config sample is below :

NameVirtualHost *

#### NOTE!!! This entry must be first so any connection that does
# not match a virtualhost name will match the default (first) server.

ServerAdmin webmaster@domain.com
DocumentRoot /path/to/doc/root/for/this/server
ServerName www.domain.com


ServerAdmin webmaster@otherdomain.com
DocumentRoot /path/to/other/domain/root
ServerName www.otherdomain.com


ServerAdmin webmaster@moredomains.com
DocumentRoot /path/to/you/know/where
ServerName www.guesswhere.com


Read the rest of this entry...

Bookmark and Share My Zimbio http://www.wikio.com

Tuesday, June 2, 2009

Free Nero alternatives

Tired of using Nero? or just looking around for best, free alternative for Nero CD/DVD Burner. Nero is one of the best softwre out ther for CD/DVD burning but it proves to cost quite high plus for some time now have gathered some bulk because of added features.

Below I've listed some of the best, free alternatives I can find.

1. Infrarecorder


This is what I'm currently using for my office laptop, since I need not install it plus is has all you might expect in a CD/DVD Burning software like Nero. It's also simple and straightforward. This free software's highlights are as follows:


* Support for Multi-Session
* Very Light on Resources
* Support for not just ISO, but also BIN
and CUE images
* Burning on Dual Layer DVDs is supported


2. CDBurnerXP

I guess this is the most popular free alternative for Nero but I listed it second here since I'm more for simplicity and ease of use. It's highlights are:


* Multi Language Interface
* Support for Blu Ray/HD DVD
* BIN > ISO converter included


3.Burn At Once

This is also a great CD/DVD Burning application that can copy discs on the fly but hasn't updated for a while now. Has these features:


* Tagging of media by importing data from FreeDB
* Multi Language Support
* Drag and Drop Interface

Read the rest of this entry...

Bookmark and Share My Zimbio http://www.wikio.com